
How to Verify Ruger No.1 Scope Rail Fitment Before Ordering
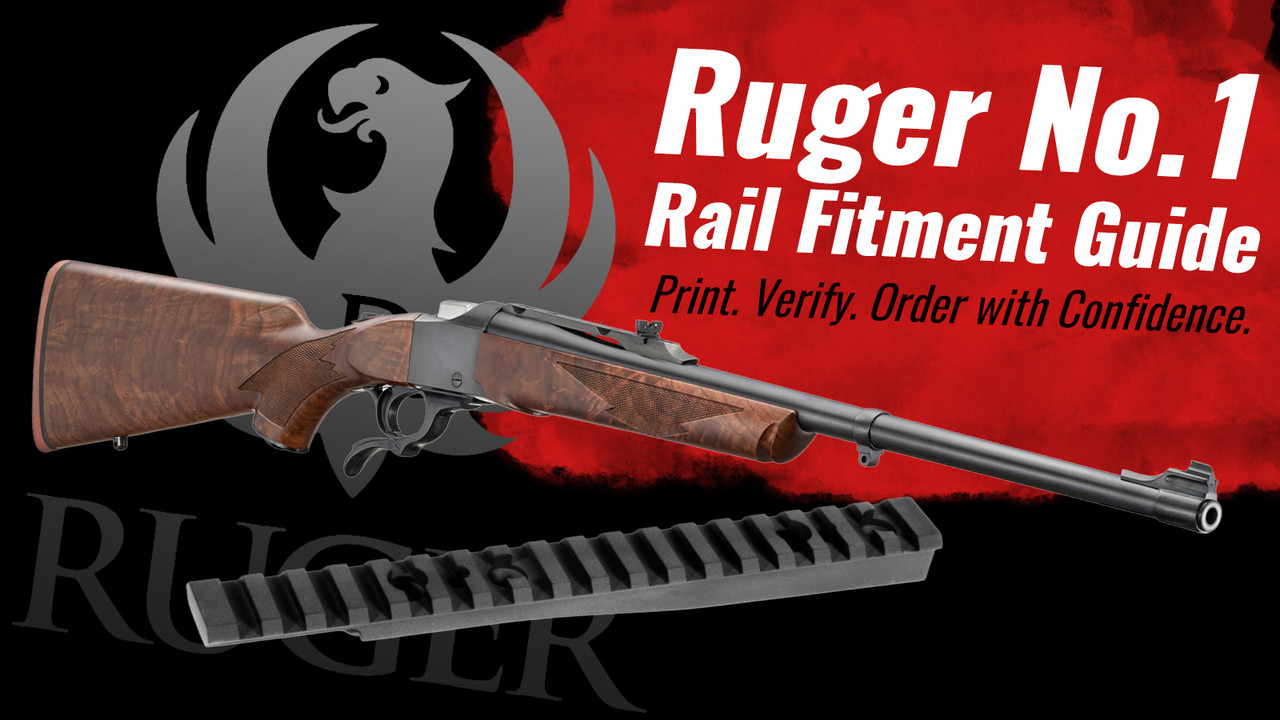
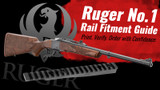
Ruger No.1 Scope Rail Fitment Guide
How to use the EGW Ruger No.1 Radius Gauge and Hole Spacing Guide to verify your rifle before ordering.
The Ruger No.1 is a well-known single-shot rifle that has been produced in numerous configurations. Although different Ruger No.1 rifles may look very similar, the contour of the barrel and the position of the factory scope-mounting holes may not be identical on every rifle.
These differences can affect whether a one-piece Picatinny rail fits correctly. A rail may appear to be the correct model while still having a different barrel contour, front-hole spacing, rear-hole spacing, or distance between the front and rear mounting-hole groups.
To help customers verify compatibility before ordering, EGW created a printable Ruger No.1 Radius Gauge and Hole Spacing Guide. This guide allows you to compare the barrel contour and mounting-hole pattern of your rifle to the dimensions required by the EGW rail.
Download the Ruger No.1 Fitment Guide
Print the guide at actual size, confirm the one-inch reference scale, cut along the marked line, and compare it directly to your rifle.
Download the Printable Fitment GuideWhy Ruger No.1 Fitment Must Be Verified
Scope rails are machined to sit against a specific barrel contour while aligning with a specific set of mounting holes. If either the contour or the hole pattern is different, the rail may not sit correctly or the mounting screws may not align.
The printable guide checks the four measurements that are most important for fitment:
- The radius around the rear mounting-hole area
- The radius around the front mounting-hole area
- The spacing of the mounting holes within each hole group
- The center-to-center spread between the front and rear hole groups
Ruger No.1 Barrel Contours
EGW offers Ruger No.1 rails for different barrel contours. The two contours covered by this guide are:
Ruger No.1 B Barrel Contour
Use the printable radius gauge to verify whether the front and rear contours of your barrel match the B contour rail.
Ruger No.1 S Barrel Contour
Use the printable radius gauge to verify whether the front and rear contours of your barrel match the S contour rail.
We have found that Ruger No.1 rifles with barrels measuring approximately 24 to 26 inches commonly came with B or S contour barrels. Rifles that came with shorter barrels commonly used an A contour barrel.
Production differences, caliber-specific configurations, replacement barrels, and other variations can make visual identification unreliable. Always compare the guide directly to the rifle.
What You Will Need
- The printed EGW Ruger No.1 fitment guide
- A printer capable of printing at 100 percent scale
- A ruler or tape measure
- Scissors
- Good lighting
- Your unloaded Ruger No.1 rifle
Step 1: Print the Guide at Actual Size
Open the PDF and select the print option. In your printer settings, choose Actual Size or set the scale to 100 percent.
Do not use automatic resizing options such as:
- Fit to page
- Scale to fit
- Shrink oversized pages
- Fill printable area
These settings can change the size of the guide and make the radius and hole-spacing references inaccurate.
Confirm the One-Inch Scale
The guide includes a line labeled 1 Inch for Scale. After printing, measure this reference line with an accurate ruler.
Step 2: Cut Along the Marked Line
Carefully cut along the line labeled Cut Along Line. This exposes the two curved sections of the template that represent the front and rear barrel radii.
Make the cut as cleanly and accurately as possible. An uneven or excessively wide cut can make it more difficult to judge how closely the template matches the rifle.
Step 3: Check the Rear Barrel Radius
Locate the curved section of the template labeled Back Hole Radius. Place this portion of the guide against the corresponding rear mounting-hole area of the barrel.
A correct radius should:
- Follow the barrel contour evenly
- Sit against the barrel without rocking
- Show little or no visible gap between the paper and barrel
- Contact both sides of the curved barrel surface consistently
If the center of the template touches but the edges do not, or the edges touch while a gap remains in the center, the barrel radius may not match the rail.
Step 4: Check the Front Barrel Radius
Repeat the same process using the curved section labeled Front Hole Radius. Position it against the barrel near the front mounting-hole group.
The paper template should follow the contour closely without obvious gaps or interference. Both the front and rear radius checks must match. A correct match at only one location is not enough to confirm compatibility.
Step 5: Verify the Mounting-Hole Pattern
After checking the barrel contours, compare the factory mounting holes to the spacing references printed on the guide.
| Measurement Area | Guide Reference |
|---|---|
| Rear mounting-hole spacing references | .505 inch and .495 inch |
| Front mounting-hole spacing references | .382 inch and .618 inch |
| Front-to-rear center spread | 3.000 inches |
The 3-inch center spread refers to the distance between the centers of the front and rear mounting-hole groups. It does not refer to the total length of the rail or the overall distance between the outermost screw holes.
We have found that certain Ruger No.1 calibers may have mounting holes or recoil pins located differently. This is one reason caliber, barrel length, or model designation alone should not be used to determine rail compatibility.
All parts of the mounting pattern must agree with the guide. Matching only the overall three-inch spread does not confirm fitment if the individual hole positions or barrel radii are different.
Understanding the Ruger No.1 Recoil Pin Locations
The recoil pin holes on your barrel may not line up with every recoil-pin recess machined into the bottom of the EGW mount. Ruger may place the recoil pins in different locations depending on the rifle's caliber and production configuration.
The mounting screws are designed to serve as the primary recoil lugs for the rail. The rear recoil lug provides additional support, while the mounting screws secure the rail and resist movement under recoil.
Do not modify the mount solely because a recoil pin does not align with one of the machined recesses. First confirm that the barrel contour, mounting-hole positions, and rear recoil lug engagement are correct.
How to Interpret the Results
The Guide Matches
Your rifle is a likely match for the EGW Ruger No.1 rail when all of the following are true:
- The one-inch print scale is accurate
- The rear radius matches the barrel
- The front radius matches the barrel
- The individual mounting-hole positions match
- The front-to-rear center spread is three inches
- The rear recoil lug properly engages the rifle
The Guide Does Not Match
Stop and contact EGW before ordering if:
- One or both barrel radii leave a visible gap
- The template rocks on the barrel
- One or more mounting holes do not align
- The center spread is not three inches
- The rear recoil lug cannot engage correctly
- You cannot confidently determine whether the contours match
What to Send EGW If You Need Help
If you are uncertain about the results, send our customer service team clear photographs showing:
- The top of the barrel and receiver
- All factory scope-mounting holes
- The rear radius gauge positioned against the barrel
- The front radius gauge positioned against the barrel
- The hole-spacing section aligned with the mounting holes
- The barrel recoil pin locations
- The one-inch reference scale next to a ruler
- The rifle's caliber and barrel length
Take the photographs from directly above or directly beside the barrel whenever possible. Angled photographs can make gaps and alignment appear different than they actually are.
Frequently Asked Questions
Can I identify the correct rail using only my rifle's serial number?
The safest method is to verify the rifle directly. Production dates and serial-number information may be helpful, but they do not replace checking the actual barrel contour and mounting-hole pattern.
Can I identify fitment using only the rifle's caliber?
No. We have found that certain calibers may use different mounting-hole or recoil-pin locations. The caliber marking alone does not confirm the barrel contour or mounting-hole pattern. Use the printable guide to check the rifle itself.
Can barrel length tell me which contour I have?
Barrel length can provide a useful starting point. Ruger No.1 rifles with 24 to 26-inch barrels commonly came with B or S contour barrels, while rifles with shorter barrels commonly came with A contour barrels. However, barrel length does not guarantee fitment. Always verify the actual barrel contour with the printable guide.
What happens if the PDF prints slightly smaller than actual size?
The radius and hole-spacing references will also be smaller, which can produce an incorrect fitment result. Do not use the guide unless the one-inch reference line measures exactly one inch.
Can I use calipers instead of the paper guide?
Calipers can help verify the hole pattern, but measuring the barrel radius requires additional care. The printable guide provides a convenient way to compare both the contour and hole positions without specialized radius gauges.
What if the holes align but the radius does not?
The rail should not be installed. The mounting holes and barrel radius must both match. A rail that does not sit correctly against the barrel may be placed under stress when the screws are tightened.
What if the radius matches but one mounting hole is slightly off?
Do not force the screw or modify the hole. Contact EGW and provide photographs of the barrel and template so we can help review the pattern.
What if a recoil pin does not align with a recess in the mount?
This may be normal. Ruger may place recoil pins in different locations depending on caliber and production configuration. The mount can still function properly using the rear recoil lug and mounting screws. The mounting screws are designed to serve as the primary recoil lugs.
Do all of the recoil pins have to engage the mount?
No. The mount does not require every barrel recoil pin to engage a machined recess. Proper engagement of the rear recoil lug and correct alignment of the mounting screws are the primary considerations.
Should I use the mounting screws to test the fit?
No. Verify the barrel using the guide before attempting installation. The screws should not be used to pull the rail into position or compensate for a contour or alignment problem.
Verify Before You Order
Small differences in barrel contour, mounting-hole placement, and recoil-pin location can determine whether a Ruger No.1 scope rail fits correctly. The EGW Ruger No.1 Radius Gauge and Hole Spacing Guide gives you a straightforward way to check your rifle before placing an order.
Taking a few minutes to verify the one-inch print scale, front radius, rear radius, individual hole positions, and three-inch center spread can help prevent ordering the wrong part and make installation more straightforward.
Confirmed Your Fitment?
Once every part of the guide matches your rifle, visit the product page to review the EGW Ruger No.1 Picatinny rail.
Shop the Ruger No.1 RailNewest Guide & Blog Updates
Large Ring vs. Small Ring Mauser Actions: How to Tell the Difference
Large Ring vs. Small Ring Mauser Actions: How to Tell the Difference The Mauser bolt-action rifle i...
1911 Sear Spring Guide: Finger Function and Problems
The Complete Guide to the 1911 Sear Spring: What Each Finger Does and What Can Go Wrong The 1911 s...
Tired of Waiting on Beretta Factory Plates? Upgrade to EGW Direct Replacements
Upgrading Your Beretta 92 RDO: The Ultimate Direct-Replacement Optic Plates Tired of waiting on fact...
How to Verify Ruger No.1 Scope Rail Fitment Before Ordering
Ruger No.1 Scope Rail Fitment Guide How to use the EGW Ruger No.1 Radius Gauge and Hole Spacing Gu...

Marlin 1895 Mounting Solutions: The Ultimate Guide to Modernizing Your Lever Gun
Marlin 1895 & Henry Lever Action Mounting Solutions: Picatinny Rails, Scope Mounts & Red Dot Option...
Springfield Prodigy Mag Catch Upgrade - EGW HD Machined Tool Steel
Springfield Prodigy Mag Catch Upgrade: EGW HD Machined Tool Steel The ultimate upgrade for reliable...